





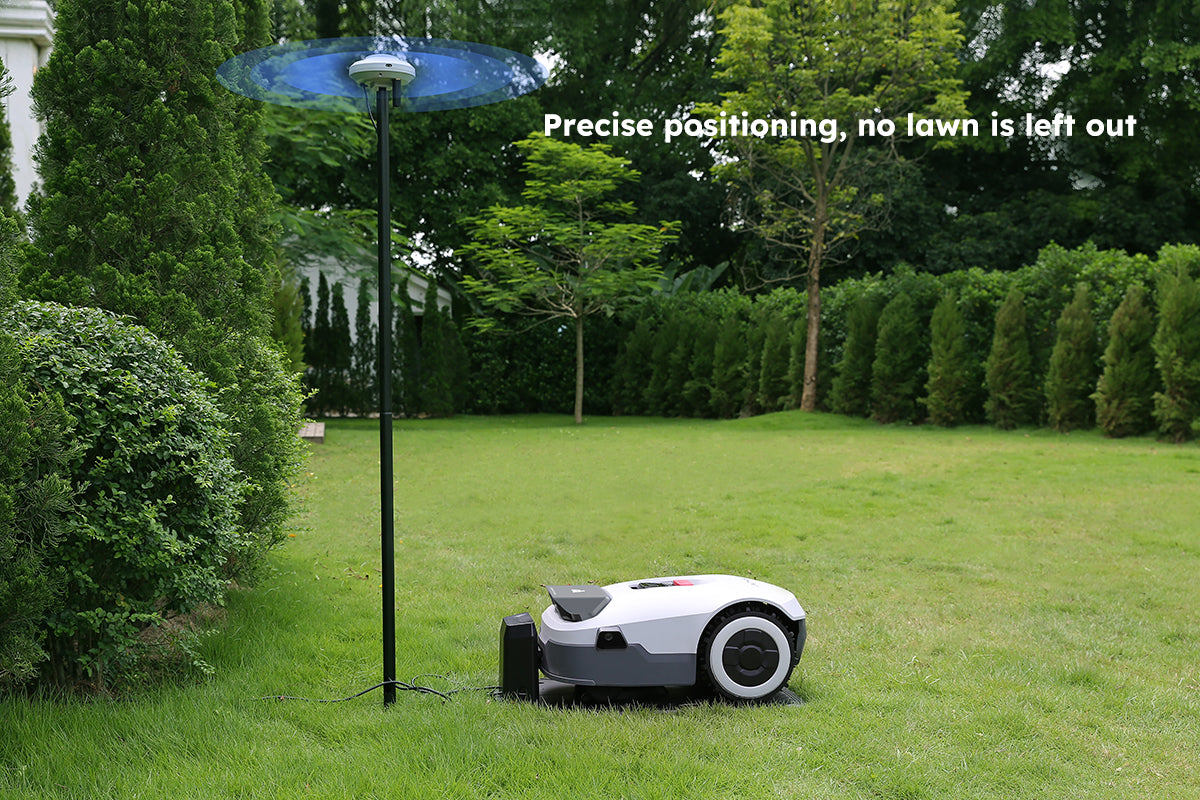
Installing a robotic lawn mower is usually straightforward, but the setup process depends on how the mower navigates your garden. Some models require a physical boundary wire, while others use RTK positioning or camera-based vision systems to map the lawn and define mowing areas.
Before choosing a model, it is worth understanding what installation involves. Factors such as garden layout, signal coverage, charging station placement, and the need for boundary adjustments can all affect the setup process.
Table of Contents
Robotic Lawn Mower Installation: Wire vs. RTK vs. Vision
Robotic lawn mowers use different navigation technologies, and each one has its own installation requirements. The main differences are whether you need to lay a physical boundary wire, install a positioning base station, or map the lawn using cameras.
Boundary-Wire Systems
Traditional robotic mowers use a boundary wire installed around the lawn to define the mowing area. The wire connects to the charging station and creates a signal that guides the mower.
- Installation requirements: Boundary wire, charging station, and basic installation tools.
- Setup process: Lay and secure the wire around the lawn, connect it to the charging station, and configure the mower.
- Installation difficulty: Moderate to high, depending on garden size and layout.
- Best suited for: Gardens with clearly defined boundaries where a permanent wire installation is acceptable.
RTK Navigation Systems
RTK-based robotic mowers use satellite positioning with correction data to navigate accurately. Depending on the model, they may require a local RTK reference station or use Network RTK through a mobile connection.
- Installation requirements: Charging station, reliable satellite reception, and either an RTK base station or access to a supported correction service.
- Setup process: Position the charging station, configure the positioning system, and create virtual boundaries through the app.
- Installation difficulty: Generally easier than laying boundary wire, but positioning and signal conditions need attention.
- Best suited for: Open gardens with good satellite visibility and relatively few signal obstructions.

Vision-Based Navigation Systems
Vision-based robotic mowers use cameras and image recognition to understand their surroundings and navigate the lawn. Depending on the model, users may be able to create a map automatically or guide the mower around the lawn during setup.
- Installation requirements: Charging station, a compatible app, and a lawn environment suitable for visual recognition.
- Setup process: Position the charging station, connect the mower to the app, and complete automatic or manual mapping.
- Installation difficulty: Usually straightforward, with no boundary wire or separate RTK base station required on some models.
- Best suited for: Gardens where users prefer wire-free setup and where the mower's vision system can reliably recognize the lawn boundaries.
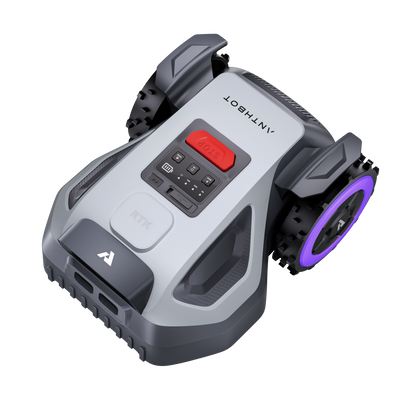


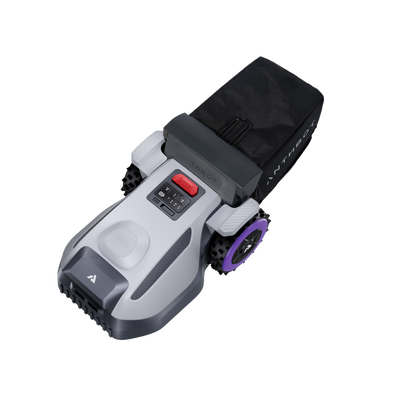
Boundary-Wire Robot Mowers: How They Work and How Difficult Are They to Install?
Boundary-wire robotic mowers use a physical wire to mark the area where the mower is allowed to operate. The wire is usually installed around the lawn's perimeter and connected to the charging station, creating an electrical signal that the mower detects to identify its working area.
Some systems also use a guide wire to help the mower navigate back to the charging station or travel through narrow passages.
How Does a Boundary-Wire System Work?
The boundary wire forms a closed loop around the mowing area. When the mower approaches the wire, its sensors detect the signal and trigger it to turn back, keeping it within the designated area.
The wire can typically be placed in two ways:
- Above ground: Secured to the lawn with ground pegs. This is generally quicker to install and allows for easier adjustments.
- Underground: Buried slightly below the soil surface. This provides a neater, more permanent installation but requires additional work.
The charging station is connected to the boundary wire and provides the signal that defines the mowing area. Once the loop is correctly installed, the mower can operate within the enclosed zone.
How Difficult Is Installation?
Installing a boundary-wire mower requires more physical work than most wire-free systems. The main task is laying the wire around the entire lawn while maintaining the correct distance from edges, flower beds, paths, and other obstacles.
The difficulty depends on the garden's size and layout. A simple rectangular lawn is relatively easy to prepare, while gardens with trees, separate lawn sections, narrow passages, or complex borders require more careful planning.
Common installation challenges include:
- Measuring the boundaries: The wire must follow the lawn's shape while maintaining the manufacturer's recommended distance from edges.
- Creating separate zones: Islands may need to be formed around flower beds, trees, or other areas the mower should avoid.
- Handling narrow passages: The wire layout must allow the mower to pass through without getting stuck.
- Connecting the charging station: The wire loop must be connected correctly and tested to ensure the mower can detect the boundary signal.
Overall, boundary-wire systems are reliable once installed, but the initial setup can take several hours or longer depending on the garden. They are a practical choice for users who prefer clearly defined physical boundaries and do not mind spending time on installation.

RTK Robot Mowers: How They Work and What Installation Involves
RTK (Real-Time Kinematic) navigation uses satellite positioning and correction data to help a robotic lawn mower determine its location with high accuracy. Instead of relying on a physical boundary wire, users can define mowing areas and no-go zones digitally through a mobile app.
This makes RTK robotic mowers a popular option for people who want wire-free installation and more flexible lawn management.
How Does RTK Navigation Work?
A standard GNSS receiver uses signals from satellites to estimate its position. RTK improves positioning accuracy by applying correction data from a reference source, helping the mower follow virtual boundaries more precisely.
There are two common RTK setups:
- Local RTK base station: A reference station is installed in the garden and provides correction data to the mower. Its position and surrounding environment are important for reliable reception.
- Network RTK: The mower receives correction data through a supported mobile network service, so a separate local base station may not be necessary. Availability depends on the model, network coverage, and correction service.
With either setup, users can generally map the lawn, create virtual boundaries, and mark areas that the mower should avoid using the app.
What Does Installation Involve?
RTK mower installation is usually less physically demanding than laying boundary wire, but it requires careful attention to positioning and signal conditions.
Typical setup steps include:
- Choose a charging station location: Place it on stable, level ground with enough clearance for the mower to enter and leave.
- Set up the RTK system: For models with a local base station, install it in a suitable position with a clear view of the sky. Network RTK models may instead require a supported mobile connection.
- Connect the mower to the app: Follow the manufacturer's instructions to pair the mower and configure its positioning system.
- Create a virtual map: Guide the mower around the lawn or use the available automatic mapping function, depending on the model.
- Set boundaries and no-go zones: Mark flower beds, trees, paths, and other areas that should be excluded from mowing.
- Test the navigation: Check whether the mower follows the virtual boundaries correctly and can return to its charging station.
What Can Make RTK Installation Difficult?
Although RTK systems eliminate boundary wires, they still depend on suitable positioning conditions. Buildings, dense tree cover, and other obstructions can interfere with satellite reception and affect navigation accuracy.
Before installation, consider the following:
- Satellite visibility: Open areas generally provide better reception than gardens surrounded by tall buildings or dense trees.
- Base station placement: If the mower requires a local RTK station, it should be installed according to the manufacturer's height, clearance, and positioning recommendations.
- Mobile network coverage: Network RTK models need a reliable connection to the supported correction service.
- Garden layout: Narrow passages and areas with heavy obstructions may require additional mapping or navigation checks.
Overall, RTK robotic mowers can make installation much simpler by replacing physical wires with virtual boundaries. However, the setup is not entirely location-independent. Checking satellite visibility, correction-service availability, and the manufacturer's installation requirements beforehand can help avoid navigation problems later.

Vision-Based Robot Mowers: How They Work and What to Expect During Installation
Vision-based robotic lawn mowers use cameras and image-processing technology to recognize their surroundings and navigate the lawn. Instead of relying on a physical boundary wire or satellite positioning alone, they use visual information to identify lawn edges, obstacles, and other features in the garden.
Depending on the model, some systems can automatically map the lawn, while others require users to guide the mower around the boundaries during initial setup.
How Does Vision-Based Navigation Work?
Vision-based systems use cameras to capture images of the surrounding environment. The mower processes this visual information to identify the lawn area, recognize boundaries, and adjust its movement.
Some models also combine camera navigation with other technologies, such as LiDAR or satellite positioning, to improve navigation in different garden conditions.
Key capabilities may include:
- Visual boundary recognition: Cameras help identify the edges between grass and other surfaces, such as paving or flower beds.
- Automatic or assisted mapping: Depending on the model, the mower can map the lawn automatically or allow users to define the working area through the app.
- Obstacle detection: Image recognition helps identify objects such as garden furniture, trees, and toys, allowing the mower to adjust its route.
- Virtual boundary management: Users can create mowing zones and no-go areas without installing physical boundary wires.
What Does Installation Involve?
Vision-based robotic mowers generally require fewer physical installation steps because they do not need boundary wires or, in some models, a separate RTK base station.
A typical setup involves the following steps:
- Prepare the lawn: Remove temporary objects, clear excessive grass or debris, and make sure the lawn edges are visible.
- Position the charging station: Choose a stable, level location with sufficient space for the mower to dock and leave.
- Connect the mower to the app: Pair the mower with the manufacturer's app and complete the initial configuration.
- Create the lawn map: Use automatic mapping if supported, or guide the mower around the lawn to define its boundaries.
- Adjust mowing areas: Review the map, correct any inaccurate boundaries, and add no-go zones around flower beds, ponds, or other restricted areas.
- Test navigation: Run the mower in the garden and check whether it recognizes the lawn boundaries and navigates around obstacles as expected.
What Can Make Vision-Based Installation Difficult?
Although the setup is usually straightforward, visual navigation depends on the mower's ability to recognize its surroundings. Certain garden conditions may make mapping or navigation more challenging.
- Unclear lawn boundaries: Grass that blends into surrounding vegetation or surfaces may be harder for the mower to distinguish.
- Poor lighting conditions: Strong shadows, changing light, or low-light conditions can affect camera-based recognition, depending on the system.
- Complex garden layouts: Narrow passages, irregular edges, and separate lawn sections may require additional mapping adjustments.
- Temporary obstacles: Objects left on the lawn during mapping can affect the initial map or mowing route.
Overall, vision-based robotic mowers can offer a convenient wire-free installation process, particularly for users who want to avoid laying boundary wires or installing a separate positioning station. However, camera capabilities and mapping methods vary between models, so it is important to check the manufacturer's requirements and test the mapped area before starting regular mowing.

How to Install a Boundary-Wire Robot Lawn Mower
Installing a boundary-wire robotic mower involves preparing the lawn, laying the wire, connecting the charging station, and testing the mower's working area. Although the process takes more physical effort than setting up most wire-free models, following a clear sequence can make it much easier.
Before starting, check the manufacturer's installation manual. Wire distances, placement depth, passage width, and charging station clearance vary between models.
Step 1: Prepare the Lawn
Start by inspecting the garden and identifying the areas the mower should cover.
- Remove stones, branches, toys, and other objects from the lawn.
- Mark flower beds, trees, ponds, and other areas that need protection.
- Identify narrow passages and separate lawn sections.
- Check for uneven ground, steep slopes, and obstacles that may affect mowing.
A simple sketch of the garden can help you plan the boundary wire route before installation.
Step 2: Choose a Location for the Charging Station
Place the charging station on firm, level ground in a location that is easy for the mower to access.
Consider the following:
- Choose a spot with convenient access to a power outlet.
- Leave enough open space around the station for docking and departure.
- Avoid locations where water may collect or where the station could be easily damaged.
- Make sure the mower can approach the station without obstacles.
Follow the manufacturer's instructions for the required clearance in front of and around the station.
Step 3: Lay the Boundary Wire
Start from the charging station and follow the planned route around the lawn. Keep the wire at the recommended distance from lawn edges, paths, flower beds, and other obstacles.
There are two common installation methods:
- Above-ground installation: Secure the wire to the lawn using pegs. This is easier to install and adjust, and the wire can gradually become less visible as the grass grows.
- Underground installation: Bury the wire at the depth specified by the manufacturer. This creates a cleaner finish but requires more preparation.
For areas such as trees or flower beds that the mower must avoid, create a wire loop around the obstacle according to the manufacturer's wiring instructions.
Step 4: Connect the Wire to the Charging Station
Once the boundary wire forms a complete loop, connect both ends to the designated terminals on the charging station.
Check that:
- The wire is connected to the correct terminals.
- There are no breaks or loose connections.
- The loop follows the intended mowing area.
- The charging station indicates that the boundary signal is working correctly.
If the station reports a wire error, inspect the connections and the entire loop for damage or loose sections.
Step 5: Configure the Mower
Place the mower on the charging station and follow the manufacturer's setup instructions.
Depending on the model, this may involve:
- Installing the mobile app and creating an account.
- Pairing the mower with your smartphone.
- Connecting the mower to the charging station.
- Setting the mowing schedule and other operating preferences.
- Configuring additional zones or guide-wire functions, if supported.
Step 6: Test the Boundaries and Mowing Route
Before leaving the mower to operate independently, run a test cycle.
Watch how it approaches the boundary wire, navigates around obstacles, and returns to the charging station. Check for areas where it may get stuck or fail to cover the lawn.
If necessary, adjust the wire position, remove obstacles, or correct the layout before starting regular mowing.
Final Installation Check
Before the first full mowing session, confirm that:
- The boundary wire forms a complete, functioning loop.
- The charging station is stable and correctly connected.
- Restricted areas are properly enclosed.
- Narrow passages are accessible.
- The mower can navigate the lawn and return to its charging station.
Installation tip: Do not rush the boundary-wire layout. Taking time to plan the route and test the entire perimeter can help prevent navigation problems and reduce the need for adjustments later.

How to Install an RTK Robot Lawn Mower
RTK robotic mowers replace physical boundary wires with virtual maps created through a mobile app. Installation mainly involves positioning the charging station, setting up the RTK positioning system, and defining the mowing area.
The exact process depends on whether the mower uses a local RTK base station or Network RTK. Always check the manufacturer's instructions before choosing installation locations.
Step 1: Check the Garden and Signal Conditions
Before installing the mower, inspect the garden to identify potential positioning challenges.
- Look for open areas with a clear view of the sky.
- Check whether buildings, dense trees, or other structures may obstruct satellite signals.
- Identify narrow passages and separate lawn sections.
- For Network RTK models, confirm that the required mobile network and correction service are available.
Good signal conditions help the mower maintain reliable positioning during operation.
Step 2: Position the Charging Station
Choose a stable, level location where the mower can dock and leave without obstruction.
Make sure the station is close enough to a suitable power supply and has sufficient clearance around it. Avoid placing it in areas where water collects or where nearby objects may interfere with the mower's approach.
Step 3: Install the RTK Base Station (If Required)
If your mower uses a local RTK base station, install it according to the manufacturer's recommendations.
Important considerations include:
- Open sky visibility: Choose a location with as few obstructions as possible.
- Suitable height: Mount the station at the recommended height using the supplied bracket or pole.
- Stable installation: Make sure it is firmly secured and will not move during operation.
- Connection: Connect the station to its power supply and pair it with the mower as instructed.
Not every RTK mower requires a separate base station. Models using Network RTK may receive correction data through a supported mobile connection instead.
Step 4: Connect the Mower to the App
Download the manufacturer's app and follow the setup instructions to pair your mower.
Depending on the model, you may need to:
- Create an account or sign in.
- Connect the mower to your smartphone.
- Configure Wi-Fi or mobile network settings.
- Activate the RTK positioning system.
- Check whether the mower is receiving positioning and correction data.
Wait until the app confirms that the positioning system is ready before creating the lawn map.
Step 5: Create a Virtual Lawn Map
Once the positioning system is working, use the app to define the mowing area.
Some models allow you to guide the mower around the lawn perimeter, while others support automatic mapping. Follow the method provided by your model.
During mapping:
- Trace the actual lawn boundaries as accurately as possible.
- Include all lawn sections you want the mower to cover.
- Check narrow passages and connecting routes.
- Avoid including flower beds, ponds, paths, or other restricted areas.
Step 6: Set No-Go Zones and Mowing Preferences
After creating the map, add virtual no-go zones around areas the mower should avoid, such as flower beds, trees, ponds, and outdoor furniture.
If the app supports multiple mowing zones, configure them separately and set suitable schedules for each area.
Review the map carefully before saving to make sure the boundaries and restricted areas are correct.
Step 7: Test Navigation and Charging
Start a test run and observe how the mower follows its virtual boundaries.
Check whether it:
- Stays within the mapped mowing area.
- Passes through narrow connections correctly.
- Avoids restricted zones.
- Maintains stable positioning.
- Returns to the charging station successfully.
If the mower frequently loses positioning or deviates from the mapped area, check satellite visibility, base station placement, and network connectivity where applicable.
Final Installation Check
Before starting regular mowing, confirm that:
- The charging station is securely installed.
- The RTK base station is correctly positioned, if required.
- The positioning system is receiving correction data.
- The virtual lawn map accurately reflects the garden.
- No-go zones and mowing schedules are configured.
- The mower can complete a test run and return to its station.
Installation tip: RTK navigation depends on positioning conditions, not just the initial setup. If your garden has dense tree cover or is surrounded by tall buildings, test signal stability before relying on fully autonomous mowing.

How to Install a Vision-Based Robot Lawn Mower
Vision-based robotic mowers use cameras and image recognition to understand the lawn and navigate without physical boundary wires. Depending on the model, they may support automatic mapping or require users to guide the mower around the lawn during setup.
Compared with traditional boundary-wire systems, installation is generally simpler. However, preparing the lawn and ensuring that boundaries are easy for the cameras to recognize can help improve the initial mapping process.
Step 1: Prepare the Lawn
Before starting, make sure the lawn is clean and its boundaries are easy to identify.
- Remove toys, branches, tools, and other temporary objects.
- Clear excessive grass and debris around lawn edges.
- Identify flower beds, ponds, trees, and other restricted areas.
- Check narrow passages and separate lawn sections.
- Make sure the lawn has sufficient lighting for the mower's mapping process.
Avoid making major changes to the garden layout while the mower is being mapped.
Step 2: Choose a Location for the Charging Station
Place the charging station on stable, level ground where the mower can easily enter and leave.
Consider the following:
- Keep the station close to a suitable power outlet.
- Leave enough clearance for docking and departure.
- Avoid locations with standing water or excessive debris.
- Choose an accessible position that makes routine maintenance convenient.
Follow the manufacturer's recommendations for the station's orientation and surrounding clearance.
Step 3: Connect the Mower to the App
Download the manufacturer's app and follow the pairing instructions.
The initial setup may include:
- Creating an account or signing in.
- Connecting the mower to your smartphone.
- Configuring Wi-Fi or mobile network settings, if required.
- Checking the camera or vision system.
- Completing any available software updates.
Make sure the mower is ready for mapping before moving to the next step.
Step 4: Create a Lawn Map
The mapping method depends on the mower's capabilities. Some models can automatically recognize and map the lawn, while others require users to control the mower around the perimeter.
For manual mapping, guide the mower along the lawn edges and define the working area through the app.
During this process:
- Follow the actual grass boundaries as closely as possible.
- Include all lawn sections that need mowing.
- Pay attention to narrow passages and transitions between areas.
- Avoid mapping flower beds, ponds, paths, and other restricted spaces as part of the mowing area.
Step 5: Adjust Boundaries and No-Go Zones
After mapping, review the virtual lawn layout in the app. Correct any areas where the mower has incorrectly identified the boundary.
Add no-go zones around areas that should remain untouched, such as:
- Flower beds and vegetable gardens.
- Ponds and swimming pools.
- Trees with exposed roots.
- Outdoor furniture and other permanent obstacles.
If the mower supports multiple mowing zones, configure them according to your garden layout.
Step 6: Test Navigation and Obstacle Detection
Before scheduling regular mowing, run a test cycle and observe how the mower moves around the garden.
Check whether it:
- Recognizes the lawn boundaries correctly.
- Navigates through narrow passages.
- Avoids restricted areas.
- Detects and responds to obstacles.
- Returns to the charging station successfully.
If it repeatedly misses boundaries or enters restricted areas, adjust the map and check whether lighting, vegetation, or other visual conditions are affecting recognition.
Final Installation Check
Before the first full mowing session, make sure that:
- The charging station is correctly positioned.
- The mower is successfully connected to the app.
- The lawn map accurately reflects the garden.
- No-go zones are properly configured.
- The mower can navigate the entire working area.
- Obstacle detection and return-to-station functions have been tested.
Installation tip: Vision-based navigation relies on recognizing the surrounding environment. Keep lawn boundaries clearly defined and remove temporary objects during initial mapping. This can help the mower build a more accurate map and reduce the need for later adjustments.

Robotic Lawn Mower Installation: A Step-by-Step Checklist
Regardless of the navigation technology, a few basic checks can help make robotic lawn mower installation smoother and reduce problems during the first mowing session.
Use this checklist to review the key tasks before, during, and after installation.
Before Installation
Prepare the garden and check the mower's requirements before setting up the equipment.
- Read the manufacturer's installation manual.
- Check the mower's maximum working area and slope limitations.
- Remove branches, stones, toys, and other loose objects from the lawn.
- Identify flower beds, ponds, trees, and other areas that need protection.
- Check whether the garden has narrow passages or separate lawn sections.
- Choose a suitable location for the charging station.
- Confirm access to the required power supply, Wi-Fi, mobile network, or positioning signals.
During Installation
Follow the setup process for your mower's navigation system.
|
Installation task |
Boundary-wire mower |
RTK mower |
Vision-based mower |
|
Install charging station |
Required |
Required |
Required |
|
Lay boundary wire |
Required |
Not required |
Not required |
|
Set up RTK base station |
Not required |
Model-dependent |
Not usually required |
|
Configure app |
Required |
Required |
Required |
|
Create lawn map |
Usually not required |
Required |
Usually required |
|
Set no-go zones |
Model-dependent |
Usually supported |
Usually supported |
Also remember to:
- Check all physical connections and power supplies.
- Make sure the mower is correctly paired with the app.
- Confirm that the boundary wire or positioning system is working, where applicable.
- Review the lawn map and restricted areas.
- Set suitable mowing schedules.
Before the First Mowing Session
Do not immediately leave the mower to operate unattended. Run an initial test and check its behavior.
- Confirm that the mower stays within the designated working area.
- Check that it can navigate around obstacles and restricted zones.
- Test narrow passages and connections between mowing areas.
- Make sure it can return to the charging station.
- Check for areas where the mower gets stuck or misses grass.
- Adjust boundaries, maps, or settings if necessary.
Common Installation Mistakes to Avoid
Even when installation instructions are followed, a few common mistakes can affect mowing performance.
|
Common mistake |
How to avoid it |
|
Placing the charging station on uneven ground |
Choose a stable, level surface |
|
Incorrect boundary-wire placement |
Follow the manufacturer's recommended edge distances |
|
Installing an RTK base station near obstructions |
Choose a suitable position with good sky visibility |
|
Mapping unclear lawn boundaries |
Prepare the lawn and review the virtual map |
|
Forgetting to mark restricted areas |
Configure no-go zones before regular mowing |
|
Skipping the initial test run |
Check navigation and docking before scheduling regular operation |
Final tip: A successful installation is not just about getting the mower started. Taking time to check boundaries, positioning, and docking performance can help prevent interruptions and make routine mowing more reliable.
Final Thoughts: Choosing the Right Installation Method
Installing a robotic lawn mower does not have to be complicated. The key is understanding how different navigation systems work and choosing one that suits your garden layout and installation preferences.
Traditional boundary-wire mowers offer clearly defined physical mowing areas, but installing the wire takes time and effort. RTK models replace physical wires with virtual boundaries, although they depend on suitable satellite reception or a supported correction service. Vision-based models use cameras to recognize the lawn and simplify wire-free setup, but their performance depends on the surrounding visual conditions and mapping capabilities.
Before making a decision, consider these three factors:
- Garden layout: Open lawns, narrow passages, dense tree cover, and complex boundaries can influence which navigation system works best.
- Installation requirements: Decide whether you are comfortable laying boundary wire, installing an RTK base station, or creating a virtual map through an app.
- Navigation conditions: Check satellite visibility, network coverage, and camera recognition requirements based on the technology you choose.
Ultimately, the best robotic lawn mower is not necessarily the one with the most advanced navigation system. It is the one that can reliably handle your garden while keeping installation and ongoing adjustments manageable.
By understanding the setup requirements before purchasing, you can choose a mower that fits your lawn and enjoy more convenient, automated lawn care.



Laisser un commentaire
Ce site est protégé par hCaptcha, et la Politique de confidentialité et les Conditions de service de hCaptcha s’appliquent.