





Robot lawn mowers make lawn care easier by automating regular mowing, but like any outdoor equipment, they can encounter problems during operation. From navigation errors and sensor malfunctions to charging issues and uneven cutting, even a small problem can interrupt your mowing schedule.
The good news is that many common issues can be resolved with a few simple checks and adjustments. This guide covers the most frequent robot lawn mower problems, explains their possible causes, and provides practical troubleshooting steps to help you get your mower working again.

Table of Contents
Robot Lawn Mower Won't Start or Keeps Stopping
If your robot lawn mower won't start, stops unexpectedly, or refuses to leave its charging station, the cause may be a simple setup issue, low battery, or an active safety alert. Check the following common problems before contacting customer support. If you’re using our robot lawn mower, you can visit our Product Support page for product guides and solutions to common problems.
1. Robot Lawn Mower Won't Turn On
Possible causes:
- The battery is completely discharged.
- The power button or main switch is not activated.
- The mower is in an error or protection state.
- The battery or internal electrical components may be faulty.
How to fix it:
- Place the mower on its charging station and check whether the charging indicator responds.
- Make sure the main power switch is turned on, if your model has one.
- Check the app or display for error messages.
- Allow the battery to charge before trying again.
If the mower still won't power on, contact the manufacturer for further diagnosis.
2. Robot Lawn Mower Won't Start Mowing
Possible causes:
- No mowing schedule has been set.
- The mower is not fully charged.
- The work area has not been mapped or configured correctly.
- Rain or other weather-related protection has paused operation.
- A safety alert is preventing the mower from starting.
How to fix it:
- Check the mowing schedule in the app and confirm that the current time falls within the scheduled period.
- Make sure the battery has sufficient charge.
- Confirm that the mowing area and map settings are correctly configured.
- Check for rain delays, safety alerts, or other restrictions.
- Restart the mowing task after resolving any displayed errors.
3. Robot Lawn Mower Keeps Stopping
Possible causes:
- An obstacle is blocking the mower.
- The lift, tilt, or collision sensor has been triggered.
- The mower is stuck on uneven ground.
- The battery level is too low.
- A temporary navigation or positioning error has occurred.
How to fix it:
- Check the mower's surroundings and remove any objects blocking its path.
- Inspect the wheels and cutting deck for trapped grass, branches, or debris.
- Check the app for error codes or safety alerts.
- Move the mower to a suitable flat area if it is stuck.
- Restart the mowing task once the issue is resolved.
4. Robot Lawn Mower Won't Leave the Charging Station
Possible causes:
- The mowing schedule is inactive or has not started.
- The battery is still charging.
- The charging station is incorrectly positioned.
- The mower cannot establish its position or navigation signal.
- An error or safety restriction is preventing departure.
How to fix it:
- Check whether the mower has reached the required battery level.
- Confirm that the mowing schedule is active.
- Make sure the charging contacts are clean and the mower is correctly docked.
- Check the app for positioning or navigation errors.
- Restart the mowing task after correcting the problem.
Tip: Before troubleshooting further, check the app or mower display for error messages. These alerts can help identify the cause more quickly and prevent unnecessary adjustments.

Sensor Problems: Obstacle Detection and Safety Errors
Robot lawn mowers use sensors to detect obstacles, monitor movement, and prevent unsafe operation. Depending on the model, these systems may include cameras, LiDAR, collision sensors, lift sensors, and tilt sensors.
When a sensor becomes dirty, blocked, or malfunctions, the mower may stop unexpectedly, trigger false alerts, or fail to recognize obstacles correctly.
1. Robot Lawn Mower Keeps Detecting Obstacles
Possible causes:
- Dirt, grass, or water is covering the camera or sensor.
- Tall grass, branches, or other objects are blocking the mower's path.
- Strong sunlight, shadows, or reflective surfaces affect visual detection.
- The obstacle detection system needs recalibration or software updates.
How to fix it:
- Clean the camera lens and sensor surfaces with a soft, clean cloth.
- Remove grass, branches, toys, and other objects from the mowing area.
- Check whether the problem occurs in a specific location or under particular lighting conditions.
- Restart the mower and check whether a software update is available.
2. Robot Lawn Mower Shows a Lift or Tilt Sensor Error
Possible causes:
- The mower has been lifted or tilted during operation.
- The mower is stuck on uneven ground or has tipped over.
- Grass or debris is interfering with the sensor area.
- The lift or tilt sensor may be damaged.
How to fix it:
- Place the mower on a flat, stable surface.
- Check the wheels and underside for trapped debris.
- Make sure the mower is positioned correctly and is not tilted.
- Restart the mower and check whether the warning disappears.
3. Camera or LiDAR Sensor Is Not Working Properly
Possible causes:
- Dust, grass, or water obstructs the sensor.
- The camera lens or LiDAR window is scratched or damaged.
- Poor visibility or environmental conditions affect sensor performance.
- A software or hardware fault is preventing normal operation.
How to fix it:
- Inspect the camera lens or LiDAR window for dirt, scratches, or damage.
- Gently clean the sensor surface according to the manufacturer's instructions.
- Make sure no accessories or objects are blocking the sensor's field of view.
- Restart the mower and check for available firmware updates.
If the sensor warning continues after cleaning and restarting, contact customer support for further inspection.
Tip: Never use high-pressure water or abrasive cleaning materials on cameras and sensors. Always follow the manufacturer's cleaning instructions to avoid damaging sensitive components.

Navigation and Boundary Problems
Navigation problems can prevent a robot lawn mower from following its planned route, staying within the mowing area, or returning to its charging station. The cause often depends on the mower's navigation technology, such as boundary wire, RTK positioning, camera-based vision, or LiDAR.
1. Robot Lawn Mower Keeps Losing Its Position
Possible causes:
- Weak or unstable satellite signals in RTK-based systems.
- Trees, buildings, or other structures obstructing the signal.
- Camera or LiDAR sensors are dirty or blocked.
- The lawn map or positioning settings are incorrect.
How to fix it:
- Check the app for positioning or navigation error messages.
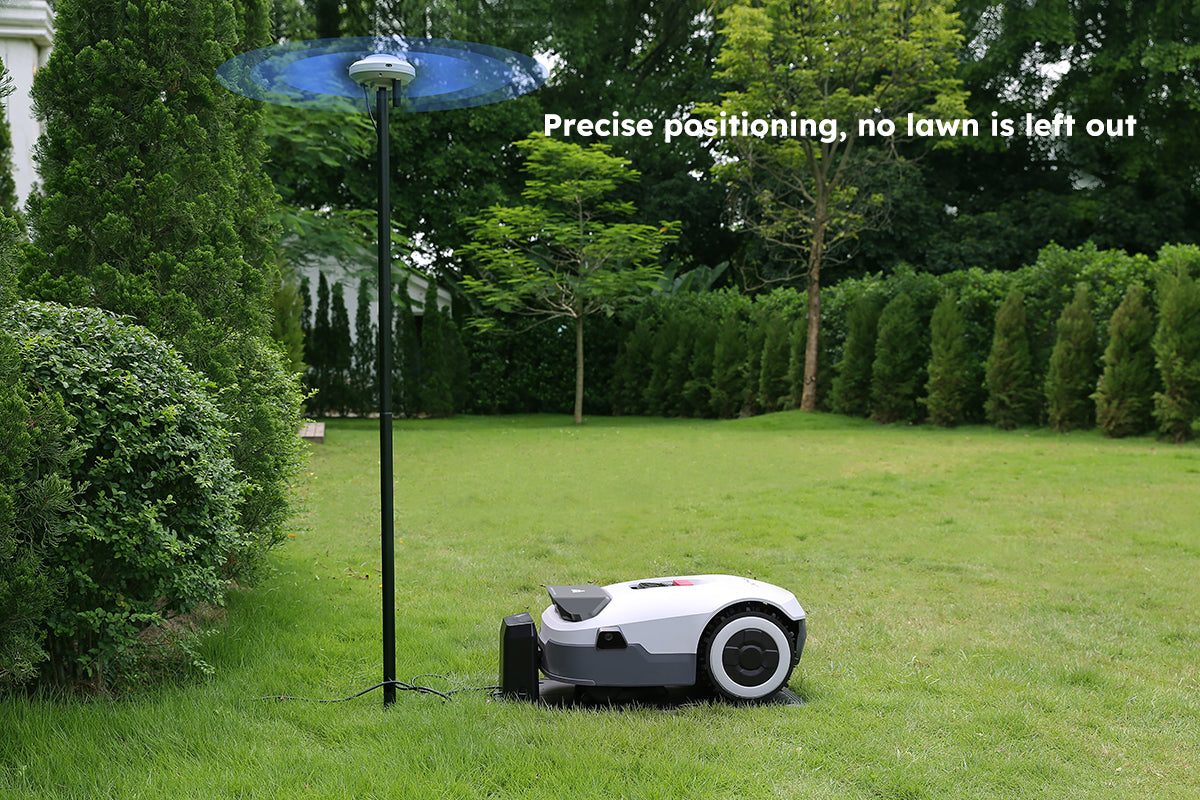
- Make sure the RTK antenna or reference station is installed in a suitable location with a clear view of the sky, if applicable.
- Clean the camera or LiDAR sensors.
- Check whether trees, buildings, or other obstacles are affecting positioning.
- Recheck the lawn map and update it if necessary.
2. Robot Lawn Mower Goes Outside the Mapped Area
Possible causes:
- The lawn boundary was mapped incorrectly.
- The virtual boundary or no-go zone is not configured properly.
- The mower's positioning accuracy has decreased.
- Boundary wire installation or signal problems affect wired models.
How to fix it:
- Open the app and check whether the mapped boundary matches the actual lawn.
- Correct any inaccurate boundary lines or no-go zones.
- Check for positioning errors and ensure the navigation system is working properly.
- For boundary-wire models, inspect the wire for damage, loose connections, or signal interruptions.
- Test the mower in a small area after updating the settings.
3. Robot Lawn Mower Cannot Find Its Charging Station
Possible causes:
- The charging station has been moved or installed incorrectly.
- The mower cannot follow its return route.
- Navigation or positioning signals are unstable.
- The route to the station is blocked by obstacles.
- The charging station or its power supply has a problem.
How to fix it:
- Make sure the charging station is installed in the recommended location.
- Remove obstacles from the return path.
- Check the app for navigation or positioning errors.
- Confirm that the charging station has power.
- If the station has been moved, update the relevant settings or map according to the manufacturer's instructions.
4. Boundary Wire Signal Is Lost
This issue applies to robot lawn mowers that use boundary wires.
Possible causes:
- The boundary wire has been cut or damaged.
- Wire connections are loose or corroded.
- The wire is disconnected from the charging station.
- Electrical interference is affecting the signal.
How to fix it:
- Check whether the boundary wire is properly connected to the charging station.
- Inspect visible sections of the wire for cuts or damage.
- Check connectors for loose or corroded connections.
- Use a compatible wire break detector if the damaged section is difficult to locate.
- Repair the wire using the manufacturer's recommended connectors and test the signal again.
Tip: Navigation problems are not always caused by faulty hardware. Before resetting the mower or creating a new map, check the app's error messages, installation conditions, and sensor status. Different navigation technologies require different troubleshooting methods, so always follow the instructions for your specific model.

Poor Cutting Performance and Uneven Lawn Edges
If your robot lawn mower leaves uncut patches, produces uneven results, or struggles to trim lawn edges, the problem may be related to blade condition, mowing settings, grass height, or lawn layout. Check the following issues to improve cutting performance.
1. Robot Lawn Mower Leaves Uncut Patches
Possible causes:
- The mowing schedule does not provide enough coverage.
- The lawn map or mowing route is incomplete.
- Tall or dense grass exceeds the mower's cutting capacity.
- Obstacles or narrow passages prevent the mower from reaching certain areas.
How to fix it:
- Check the mowing map and confirm that all lawn sections are included.
- Review the schedule and increase mowing frequency if necessary.
- Remove obstacles and clear narrow passages.
- For overgrown grass, trim it to a suitable height before letting the robot mower maintain it regularly.
2. Grass Is Cut Unevenly
Possible causes:
- Blades are dull, damaged, or installed incorrectly.
- The cutting height is set too high for the current grass length.
- Grass is too tall, thick, or wet.
- The cutting deck is blocked by grass clippings or debris.
How to fix it:
- Inspect the blades and replace dull or damaged ones.
- Check that all blades are installed correctly and can rotate freely.
- Adjust the cutting height gradually rather than removing too much grass at once.
- Clean the underside of the mower to remove accumulated grass and debris.
- Avoid mowing when the grass is excessively wet.
3. Robot Lawn Mower Misses Lawn Edges
Possible causes:
- The mapped boundary is too far from the actual lawn edge.
- The mower's edge-cutting settings are not configured correctly.
- Raised borders, walls, or uneven ground prevent the mower from reaching the edge.
- The mower is not designed to cut right up to certain physical boundaries.
How to fix it:
- Check the mapped lawn boundary and adjust it where appropriate.
- Review the edge-cutting settings in the app.
- Make sure the mower has a suitable route along the lawn perimeter.
- Use a trimmer to finish areas the mower cannot safely reach.
4. Robot Lawn Mower Makes Unusual Noises While Cutting
Possible causes:
- Grass, branches, or other debris are trapped around the cutting disc.
- One or more blades are loose, damaged, or missing.
- The cutting disc or motor has a mechanical problem.
How to fix it:
- Turn off the mower and follow the manufacturer's safety instructions before inspection.
- Check the cutting disc and remove trapped debris.
- Inspect the blades for damage or loose fasteners.
- Replace damaged blades with compatible parts.
- If unusual noises continue, stop using the mower and contact customer support.
Tip: Regularly inspect and replace worn blades to maintain consistent cutting performance. Always use compatible replacement blades and follow the manufacturer's recommended maintenance schedule. Never inspect or clean the cutting disc while the mower is powered on.

Robot Lawn Mower Gets Stuck or Struggles on Slopes
Robot lawn mowers may struggle with steep slopes, uneven ground, wet grass, or obstacles along their route. If your mower frequently gets stuck, spins its wheels, or cannot climb a slope, check the terrain and mower condition before assuming there is a mechanical fault.
1. Robot Lawn Mower Gets Stuck in the Yard
Possible causes:
- The mower encounters holes, bumps, or uneven ground.
- Grass, mud, or debris blocks the wheels.
- The mowing area contains narrow passages or tight corners.
- The mower gets trapped against tree roots, garden borders, or other obstacles.
How to fix it:
- Remove the mower from the trapped area and check its wheels for debris.
- Fill holes and level uneven sections of the lawn where possible.
- Clear branches, stones, and other obstacles from the mowing route.
- Adjust the map or no-go zones to avoid areas where the mower frequently gets stuck.
- Check whether narrow passages meet the manufacturer's minimum width requirements.
2. Robot Lawn Mower Cannot Climb Slopes
Possible causes:
- The slope exceeds the mower's maximum rated gradient.
- Wet grass or loose soil reduces wheel traction.
- Grass clippings or mud have accumulated on the wheels.
- The slope contains uneven surfaces or abrupt transitions.
How to fix it:
- Check the manufacturer's specifications for the maximum supported slope.
- Clean the drive wheels and remove mud or grass buildup.
- Avoid mowing steep areas when the grass is wet.
- Improve traction or level uneven sections where practical.
- Create a no-go zone for slopes that exceed the mower's capabilities.
3. Robot Lawn Mower Wheels Spin but It Does Not Move
Possible causes:
- The wheels have lost traction on wet grass or loose soil.
- Mud, grass, or debris is blocking the wheel treads.
- The mower is stuck in a hole or against an obstacle.
- The terrain is too steep or uneven.
How to fix it:
- Stop the mower and move it to a stable, level surface.
- Inspect the drive wheels and remove any trapped debris.
- Check the ground for mud, loose soil, or holes.
- Avoid operating the mower on slippery surfaces.
- If the wheels still fail to move normally on flat ground, contact customer support.
4. Robot Lawn Mower Struggles on Wet Grass
Possible causes:
- Wet grass reduces traction between the wheels and the ground.
- Soft soil increases the risk of the mower getting stuck.
- Damp grass clippings accumulate around the wheels and cutting deck.
- Rain protection settings may pause mowing.
How to fix it:
- Allow the lawn to dry before restarting the mower.
- Check the wheels and cutting deck for wet grass or mud buildup.
- Review the mower's rain sensor and weather-related settings.
- Avoid mowing waterlogged areas until the ground becomes firm.
Tip: Always check the mower's specified maximum slope and operating conditions before use. A mower's ability to climb a slope depends not only on its rated gradient but also on grass moisture, soil condition, tire traction, and the shape of the terrain. Never force the mower to operate on slopes beyond its rated capability.
Battery and Charging Problems
Battery and charging issues can interrupt mowing schedules and prevent a robot lawn mower from completing its work. Common symptoms include slow charging, reduced runtime, unexpected shutdowns, and failure to return to the charging station.
1. Robot Lawn Mower Won't Charge
Possible causes:
- Charging contacts are dirty or corroded.
- The power supply is disconnected or not working.
- The mower is not correctly positioned on the charging station.
- The charging station or battery has a fault.
How to fix it:
- Check that the charging station is connected to a working power outlet.
- Inspect the charging contacts on both the mower and station.
- Clean dirty contacts with a dry, soft cloth.
- Make sure the mower is correctly aligned with the charging contacts.
- Check the app or display for charging error messages.
If the mower still won't charge, contact the manufacturer for further inspection.
2. Battery Drains Too Quickly
Possible causes:
- The battery has aged and lost capacity.
- Tall or dense grass increases the mower's workload.
- Frequent slopes and difficult terrain consume more power.
- Low temperatures affect battery performance.
- The mower has to make repeated trips because of inefficient mowing settings.
How to fix it:
- Check the battery status and health information in the app, if available.
- Keep the blades sharp and clean to reduce unnecessary cutting resistance.
- Adjust the mowing schedule to suit the lawn's size and grass growth.
- Avoid mowing excessively tall or wet grass.
- Store and operate the mower within the temperature range specified by the manufacturer.
3. Robot Lawn Mower Runs Out of Battery Before Finishing
Possible causes:
- The lawn area is larger than the mower's recommended capacity.
- The mowing schedule does not allow enough time for charging and operation.
- Complex layouts, slopes, and obstacles increase operating time.
- The battery no longer provides its original runtime.
How to fix it:
- Check whether your lawn size is within the mower's recommended working area.
- Review the mowing schedule and allow sufficient time for charging between sessions.
- Reduce unnecessary obstacles and improve access between lawn sections.
- Check the battery condition if runtime has noticeably decreased.
- Consider dividing the lawn into smaller mowing zones if the model supports multizone scheduling.
4. Charging Station Has No Power
Possible causes:
- The power adapter is disconnected.
- The power outlet is not working.
- The power cable or adapter is damaged.
- The charging station has an electrical fault.
How to fix it:
- Check that the power adapter is securely connected.
- Test the outlet with another suitable device.
- Inspect the power cable for visible damage.
- Check the station's indicator lights or app notifications.
- Replace damaged power accessories only with manufacturer-approved parts.
Tip: Battery runtime varies with lawn size, grass conditions, slope, temperature, and mowing settings. If charging or runtime problems persist after basic checks, avoid opening the battery pack yourself. Contact the manufacturer or an authorized service provider for assistance.
Maintenance Problems That Affect Performance
Regular maintenance helps keep a robot lawn mower running efficiently and reduces the risk of unexpected problems. Grass clippings, dirt, worn blades, and dirty charging contacts can all affect mowing performance over time.
1. Grass Builds Up Underneath the Mower
Possible causes:
- Wet or long grass sticks to the underside of the mower.
- Grass clippings accumulate around the cutting disc.
- The mower is not cleaned regularly.
How to fix it:
- Turn off the mower and follow the manufacturer's safety instructions before cleaning.
- Remove grass clippings and debris from the underside and around the cutting disc.
- Use a soft brush or suitable cleaning tool to remove stubborn buildup.
- Check that the cutting disc can rotate freely before restarting the mower.
- Clean the mower more frequently when cutting conditions cause heavy grass buildup.
2. Robot Lawn Mower Blades Wear Out Quickly
Possible causes:
- The mower frequently cuts thick or overgrown grass.
- Blades hit stones, branches, or other hard objects.
- Blades are not suitable for the mower model.
- The blades have not been inspected or replaced regularly.
How to fix it:
- Inspect the blades regularly for dull edges, cracks, or other damage.
- Remove debris from the cutting area.
- Replace worn or damaged blades with compatible replacement parts.
- Make sure all blades and fasteners are installed correctly.
- Avoid mowing heavily overgrown lawns in a single session.
3. Robot Lawn Mower Wheels Are Blocked
Possible causes:
- Wet grass and mud accumulate around the wheels.
- Small branches, stones, or other debris become trapped.
- Wheel treads are clogged with dirt or grass.
- Wheel components are damaged or worn.
How to fix it:
- Turn off the mower before inspecting the wheels.
- Remove grass, mud, and debris around the wheels.
- Check that the wheels rotate freely.
- Inspect the wheel treads and surrounding components for damage.
- Contact customer support if a wheel remains stuck or does not rotate normally.
4. Charging Contacts Become Dirty
Possible causes:
- Dust and grass clippings accumulate on the contacts.
- Moisture causes corrosion over time.
- The mower frequently docks in a dirty or damp environment.
How to fix it:
- Disconnect the charging station from its power supply before cleaning, following the manufacturer's instructions.
- Inspect the charging contacts on the mower and station.
- Clean dirt and dust with a dry, soft cloth.
- Check for corrosion, discoloration, or physical damage.
- Make sure the contacts are completely dry before reconnecting the system.
5. Robot Lawn Mower Needs Regular Cleaning
Possible causes:
- Dirt and grass accumulate on the body and underside.
- Dust blocks ventilation openings or sensor surfaces.
- Moisture and debris remain around moving components.
How to fix it:
- Clean the mower's exterior with a soft cloth.
- Remove grass and dirt from the underside, wheels, and cutting area.
- Gently clean cameras and other sensors without scratching their surfaces.
- Check the charging station for dirt and debris.
- Allow cleaned components to dry before operating or charging the mower.
Important Maintenance Tips:
- Inspect blades and wheels regularly, especially after mowing in rough conditions.
- Clean sensors and charging contacts when they become dirty.
- Follow the manufacturer's recommended maintenance and replacement intervals.
- Check the product's IP rating and cleaning instructions before using water. Never
- assume every robot lawn mower can be washed with a hose or pressure washer.
- Disconnect power and follow the safety instructions before cleaning or inspecting the cutting system.
Tip: A consistent maintenance routine can help prevent many common performance problems. If cleaning or replacing compatible parts does not resolve an issue, contact the manufacturer rather than attempting to repair internal electrical or mechanical components yourself.

Robot Lawn Mower Troubleshooting FAQs
Here are answers to common questions about robot lawn mower operation, maintenance, and troubleshooting.
1. How Often Should I Replace Robot Lawn Mower Blades?
Blade replacement frequency depends on mowing frequency, grass conditions, and contact with hard objects such as stones and branches. Inspect the blades regularly and replace them when they become dull, bent, cracked, or damaged. Always use compatible replacement blades and follow the manufacturer's recommendations.
2. Can a Robot Lawn Mower Work in the Rain?
It depends on the model. Some robot lawn mowers have rain sensors that automatically pause mowing, while others can operate in light rain if their specifications allow it. However, wet grass can reduce cutting quality and wheel traction. Check your mower's operating instructions and avoid mowing waterlogged lawns.
3. Why Does My Robot Lawn Mower Keep Returning to the Charging Station?
Common reasons include:
- The battery has reached its return-to-charge threshold.
- The mowing schedule requires a charging break.
- The mower has completed its scheduled task.
- A navigation or positioning issue has interrupted mowing.
Check the battery level, schedule, and app notifications to identify the reason.
4. How Do I Reset My Robot Lawn Mower?
Reset procedures vary by brand and model. Some mowers support a simple restart, while others have separate factory-reset options. Check the user manual before resetting the device, as a factory reset may erase maps, schedules, and other settings.
5. Can a Robot Lawn Mower Handle Tall Grass?
Most robot lawn mowers are designed for regular maintenance mowing rather than cutting heavily overgrown grass. If your lawn is too tall, use a conventional mower or trimmer to reduce the grass height first. Then let the robot mower maintain the lawn through regular mowing sessions.
6. What Should I Do If My Robot Lawn Mower Is Stolen?
If your mower supports GPS tracking or an anti-theft alarm, use the manufacturer's app to check its last known location and activate available security features. Report the theft to local authorities and provide the serial number and proof of ownership. Never attempt to recover the mower by confronting a suspected thief.
7. When Should I Contact Customer Support?
Contact the manufacturer or an authorized service provider if:
- The mower repeatedly displays the same error after basic troubleshooting.
- The battery will not charge despite checking the power supply and contacts.
- Sensors, motors, or electrical components appear damaged.
- The mower makes persistent unusual noises.
- A problem requires internal disassembly or electrical repair.
Final Tip: Before contacting customer support, record the error code, take a screenshot of the app notification, and note when the problem occurs. Providing these details can help the support team diagnose the issue more efficiently.


Fág trácht
This site is protected by hCaptcha and the hCaptcha Privacy Policy and Terms of Service apply.